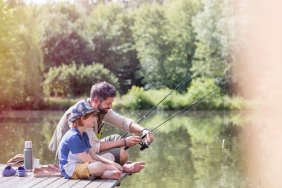
For many anglers, winter means several months of impatience, cursing the snow and marking the calendar in anticipation of the beginning of the spring season. Anglers who don’t use this time productively, however, will potentially face some frustration when spring rolls around.
Winter may cause cabin fever for some, but using this time wisely can pay off in dividends. Here are 5 things you can do to use your winter down time to prepare for spring bass fishing.
Spot-Check Your Lures
Start your spring preparations by removing all of your lures from your tackle boxes and boat compartments. Organize them and check them to see which ones require news hooks or swivels, or which ones need to be replaced altogether. Your hard baits—crankbaits, poppers, etc—may have chipped or dulled paint, which can be quickly remedied with permanent marker or lure paint, rather than spending money on new ones.
Don’t Forget the Boxes, Too
After a giving your lures a good once-over, it’s time to check your tackle boxes. Wipe them clean and replace any that have reached their end. Losing your tackle to the lake because of an iffy handle is the worst, so if you’ve got a box that you know has to be lifted on the left side, just replace it. Clear plastic storage boxes aren’t expensive to replace either, so if you have a few with loose or broken clasps, you know what to do.
Get It Sorted
Once your storage boxes are in ship-shape, put your lures and tackle back in whatever semblance of order that works for you. Want a whole storage box for floats or jigheads? Go for it! Go even further and mark the front of your drawers or the ends of your clear storage boxes with a marker to identify each type. Bonus Tip: When storing your crankbaits, you can even engrave the lip with the diving depth for quick reference.
Rods and Ends
Next, it’s time to break out the poles one by one. Starting at the top, check each eye for tightness, cracks in the material and alignment with the remaining eyes. If you find one that is cracked or missing the internal material, you’ll need to replace the defective eye or replace the rod. If you’ve never replaced a rod eye before, I recommend taking the rod to your local fishing tackle supplier and have them replace the eye professionally. If the rod is a multiple-piece model, make sure the pieces fit together smoothly and tightly and that you haven’t inadvertently been fishing with a two different poles put together. It happens. Don’t ask.
Run the Rule Over Your Reels
Examine your reels for wear, looseness or missing screws. Check the handles, too, for straightness and for ease of turning; the handles should spin smoothly. As you do this, listen to reel; there should only be the sound of the reel turning, not of the gears grinding or sounding dry. Look at the reel for lubrication points and lubricate sparingly. If needed, replace the line on the reels and make sure you don’t over-fill them or your first cast will be disastrous. Don’t under-fill your reel, either, by trying to fill two reels with one spool of line. You know who you are.
Photo credit: Flickr