 Today marks the second half of my series on the basics of mountain biking. In Part One, I broke down the differences in gears, the ins and outs of proper braking, and how and when to shift gears. Keep reading to learn some more helpful information about mountain biking that will undoubtedly round out your skill set when biking the trails.
You remember when you took driver’s education, and your instructor would tell you to trace the curve of the median line as you drove around curves or look ahead several seconds down the road? Well, you should employ this practice when riding the trails, using what’s known as your “line.” You’ll need to plan your line as you ride, and follow it closely, which can be a little hard at first. Be sure to account for obstacles such as roots or rocks and always utilize your momentum, taking care not to brake too hard to too suddenly if you don’t need to. Also, as I said in Part One, it’s okay to dismount and carry the bike across treacherous obstacles.
Smaller obstacles in your line can be easily overcome utilizing a technique known as the bunny hop, which allows you to completely take the bike off the ground for a brief moment. To do this, you need to push your weight downward and then spring upward. If done properly, both wheel will lift off the ground, allowing you to hop over small logs, rocks, and even smaller creeks.
Standing up while riding a bike has its place on the trail, as well. Yes, pedaling while standing is a little more difficult, but doing so lowers your center of gravity and shifts your overall balance, which can be needed in certain situations. When riding downhill, it can be smart to stand, as the lowering of your center of gravity will stabilize your as your pick up speed. Also, standing offers a bit of respite for your bike, which can feel great during longer rides when you’re sitting hunched over.
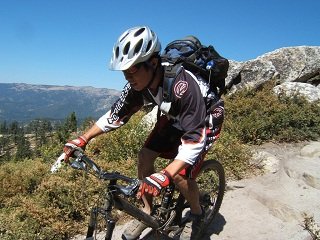
Lastly, having the proper gear along for the ride can make all the difference in the overall experience. I always suggest carrying liquids, and the amount you take will vary, depending on the length of the ride, as well as the climate. I like to wear a hydration pack, in which I can also store energy bars, my phone, my portable tire pump, and basic bike tools. Also, be sure to wear a helmet and a quality pair of riding gloves. The gloves will keep your hands free of blisters and the helmet will, well, keep you alive should you wipe out, which is always good.
Be familiar with the trail, the bike, and yourself as a rider before hitting the trails and always let someone know where you’re going, if possible. Be smart, use common sense, and when it comes to risky situations, it’s not cowardly to get off the bike and walk it. Mountain biking is a great way to enjoy the outdoors, but learning how to do so properly will not only allow you to be safe and utilize the equipment efficiently, but it will also help you find more enjoyment.