
Fire-by-friction is generally considered non-optional, impractical and even folklorish by most of today’s weekend outdoorsmen. The reality is that if your matches become wet, or a bear chews on your fancy fire starter kit, you might need another way to keep from freezing to death.
With a little practice, anyone can learn how to create fire with a bow drill. Yes, anyone. When I bust out a coal during a bow-drill demo during one my survival classes, I get a mixture of ooh’s and aah’s from my students. And as much as it feeds my ego, it’s really not magic. Here are the basics:

Materials
The wood needs to be dry and relatively soft. Cedar works very well and is abundant in the Sierras. You can also use buckeye, cottonwood, pine and even sagebrush, but cedar has always been my go-to in the woods. Consider a straight grain as this makes preparation much easier.
The Spindle
A good rule of thumb in the west is that the spindle (the part that spins causing friction) is the length of the tip of your thumb to the tip of your pinkie (think of a hang loose sign) and about as big around as your thumb. You want to start with a piece that is thick enough to carve down to a nice symmetrical shape. You want a blunt point on one end and a sharper point (the end that the socket holds) on the other.
The Fire Board
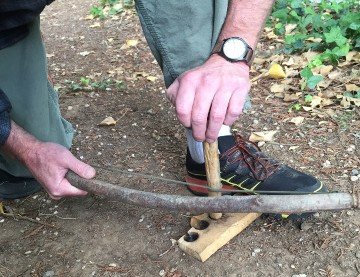
The fire board should consist of a similarly soft wood, but not too soft because you can drill right through it before it gets hot enough to ignite a coal. It should be about 3/4 of an inch thick, two or more inches wide and long enough to put a foot on one end. The notch should be cut at a 45 degree angle and should protrude a little ways into the burned in hole (see pictures).

The Socket
The socket (hand hold) should consist of a wood that is harder than the wood used for the spindle (you don’t want to burn it out) and should fit comfortably in your hand. It has a hole in it to hold the spindle from coming out when you’re drilling. A rock with a natural cone-shaped hole also works well.
The Bow
The length should be approximately the length from your elbow to your fingertips and should have a natural curve in it. There are many different materials available, but you want one that is strong and slightly flexible. Paracord is a good choice for the bow string but most cordage will work. I have used my shoe laces and also plant cordage that I made.

The Technique
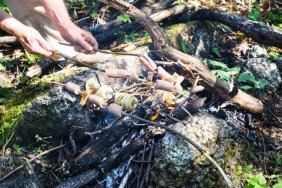
You want to start with a good posture, one that places your weight over your work. The wrist should be locked behind the leg holding down the fire board. You want to first burn a hole into the fire board (the burn in) before you cut your notch. As you start to turn the spindle, try to keep a fluid motion and use the entire length of the bow. As the wood starts to heat up, increase speed and pressure until you get smoke. It’s important to keep going at this point and increase pressure and speed. You will see the notch fill up with dust that, when properly done, has a dark-brown to black color. Carefully remove the spindle and see if you have a coal. Don’t panic, it will smolder for several minutes. You want to make sure you have your tinder bundle ready to put the coal in and your fire structure built beforehand. Carefully place the coal into the tinder bundle and gently blow it into flame. Hold the tinder bundle up because fire burns up and it will help it ignite.

This is a basic overview and it does take quite a bit of practice to get a coal. You are striving for the correct downward pressure, speed and length of time needed to build up the perfect heat. Try various techniques and materials. With persistence and a lot of patience, you will be able to make fire anywhere you find wood, and you might end up saving your life.