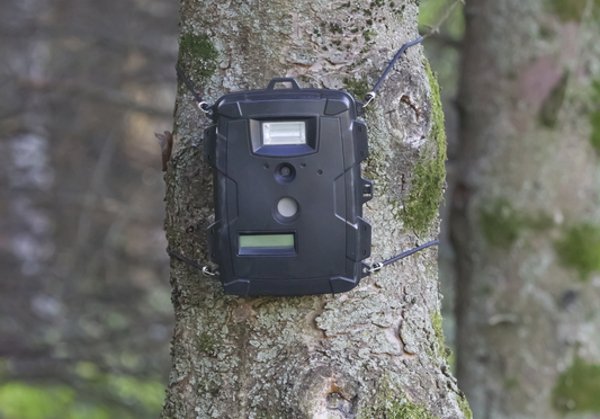
Trail cameras are one of the greatest inventions ever created for hunters. They provide an amazing tool for scouting and recording what types of game are in an area you want to hunt.
Many hunters use trail cameras, but not everyone uses them in a way to maximize their effectiveness. Here are seven tips on how to get the most out of your tail cam.
Label cameras
When you are placing multiple cameras out in the field, nothing is worse than losing track of which camera a photo came from. Label each camera with a number or other identifying mark, and also label the chip so you know what chip goes with what camera. This will save a lot of headaches when sorting through images.
GPS
Nothing is worse than placing a camera out in the field; then forgetting where you put it. Even if you remember the general location, a camo covered camera could be tough to spot, especially in heavy cover. Reduce the odds of losing your cameras by writing down the GPS location of each camera.
Sunshine
One of the best tips to follow when using trail cameras is to point them away from the sun. In most cases, this means pointing them toward a northerly direction. Keeping the sun behind the camera eliminates glare and backlighting problems that could occur if the camera is pointed toward the sun.
Infrared
If you are taking most of your photos at night, an infrared camera is the best choice. An infrared camera does not need a flash, which could scare animals away. The last thing you want to do is to spook your game, so they will not return to the area.
Angle
Be sure your cameras are angled toward the trail at 45 degrees. This will help you get a better photo the game moving past your camera, because it will result in a quicker trigger time. If the camera is not angled, it takes the camera longer to trigger, leading to missed photos.
Avoid feeders
Many hunters like to put out bait in front of their cameras to attract game to the area. This does not give you a true documentation of the movement of game in the area, and it also attracts other animals you many not care about. The best bet is to place cameras along a trail to get an idea of what is moving on the trail and when it is moving.
Clear shot
Make sure that there are no obstructions around your cameras that may hinder its operation. If foliage, branches or other obstructions are in the way of your camera you are not likely to get a clear shot of game moving past it. Obstructions may also prevent your camera from triggering when it should.
When scouting with trail cameras, you want them to work properly, so you can collect the best possible data on the area you will be hunting. Taking these steps will improve the quality and function of your trail cameras, resulting in better photos and more reliable information.
