 The benefits of hand loading are simple. Better quality bullets paired with more consistently loaded powder equals better down range results. These results translate on paper (accuracy) and in consistent bullet expansion and weight retention (bullet performance).
Hand loading seems somewhat mysterious and a bit intimidating to the uninitiated. After all, it involves explosives and complicated formulas right? Well yes and no. Hand loading ammunition is actually very easy and well documented. Far less complicated than say, baking cookies. Far less expensive and reliable than buying a new rifle and or high dollar scope to improve accuracy.
Parts and Pieces
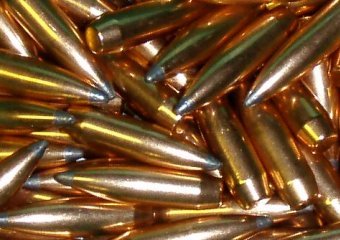
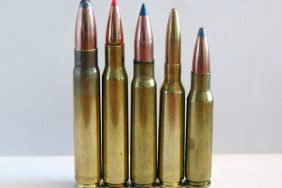
Modern bullets are quite simple. They consist of the four basic components: bullet casing, primer, powder and bullet. Home reloading equipment consists of equally simple bullet presses, dies for each caliber you will load, measuring calipers, powder scales, case trimmers, lubricant, funnels and various organizational tools. As with any useful hobby there are infinite additions and levels of perfection that can be achieved at higher levels. At the very basic beginning level achieving excellent results is quite easy.
Possibly the most important piece of equipment is the reloading book. Cabela’s carries 15 different books, and any will do the trick. Most are written by reloading companies or bullet manufacturers. Mine is the Nosler Reloading Guide and I have one page bookmarked:
7mm Remington Magnum
Load Data- 160 Grain
This page gives me all the basic recipes for my hunting bullet of choice, the Nosler Partition 160 grain bullet. It also shows the ballistic coefficient for this bullet is .475. Luckily for simple hand loaders such as myself the math is already complete! The load I shoot is 60.0 grains of IMR 4350 powder pushing a 160gr. Nosler Partition Spitzer at 2998 feet per second.
The ballistic charts at the back of the manual show the path of travel for each Ballistic Coefficient based on the muzzle velocity. A bullet with .475 ballistic coefficient muzzle velocity 2998fps zeroed at 200 yards will be 1.5 inches high at 100 yards dead on at 200 yds -6.5” at 300 -19.1” at 400 yds and -38.5” at 500 yds. This is very useful information when sighting in and practicing with your rifle. Please never shoot at an animal further than you have practiced, but once you have practiced though a 400 yard shot is practical under good conditions.
Back to the actual loading process. Batch size is important – while developing a load you don’t want to load too many bullets at a time. 6-10 is a good number. Once you have a load developed and shooting, good batch size is up to you. I load 20-40 shells per batch.
Starting with used brass
1. Clean brass inside with a bristle brush.
2. Lubricate bullets lightly on lube pad.
3. Run bullets through sizing die using bullet press. Press will also remove the used primer.
4. Check case length with caliper and trim on trimmer if needed.
5. Use deburring tool to smooth inside and outside of the case mouth.
6. Clean primer pocket with primer pocket brush
7. Prime cases using bullet press and primer arm.
8. Weigh powder in scale and pour into bullet using the powder funnel.
9. Seat bullets into cases using bullet seating die.
The first time you load, you will need to adjust the dies to set the bullet length. There are some other steps to loading for pistols, however it is the same process and components.
Follow step by step instructions in your Reloading Handbook. This article is meant only as a guide and to encourage interested shooters to take a simple step to more consistent accuracy and results.
With four ingredients and under a dozen steps, hand loading is the best and easiest way to ensure accuracy and takes only one evening with the basic tools and handbook to learn. The results will last a lifetime.
